Step 1: First, find a suitable photograph. Sunflower is one of my favorourate flower so check out my painting.

Step 2: Then duplicate the sunflower photograph layer (Ctrl/Cmd + J). Then desaturate the duplicate (Image > Adjustments > Desaturate or Ctrl/Cmd + Shift + U). Then duplicate the desaturate layer and invert the new one (Ctrl/Cmd + I). Name this layer "invert". At this point, your image should look similar to this one.

Step 3: Now change the blending mode of the "invert" layer to Color Dodge. At this time nothing will seen in the picture. Then make the "invert" layer active by clicking once on it and choose Filter > Blur > Gaussian Blur. Enter a setting between 2-3 pixels. I set here 3 pixels. At this point, you could stop here if you chose, and you would have a great pencil sketched look to your image.
Step 4: If you are moving on then click once on the "invert" layer and merge it with the "desaturate" layer by pressing Ctrl/Cmd + E. Then change the Blend mode of this new layer to Luminosity.

Step 5: Almost done. Finally, you have a few choices of filters to run on this layer. Chose Filter > Artistic > Fresco with the following settings.


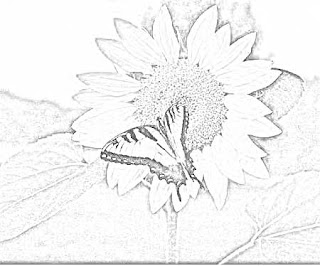
Step 6:The picture looks great but there is one more trick. Often the filters we ran on the image gave me too strong of a painterly effect. So go to opacity options set it as you wish. I set here 90%. Here is the final result.

Now compare with the original picture.

No comments:
Post a Comment